.svg)

How to easily enable passwordless authentication on your Firebase site

Firebase Auth only provides one method of passwordless authentication natively, via an email containing a magic link. Even though the end user certainly does not require a password, this process is not an optimal user flow experience. Every time the user needs to log in they have to open the email to click on the link. This is a passwordless solution, but it is not ideal.
With OwnID, you can offer an authentication mechanism to end users that is passwordless and also free of friction points. End users will be able to authenticate using just FaceID or TouchID, without having to use (or remember) a password. And you know what the best part is? OwnID integration with Firebase takes literally minutes.
Read on to learn the steps required to perform OwnID integration on websites using Firebase Auth to register and authenticate end users.
What do I need to integrate OwnID into my website?
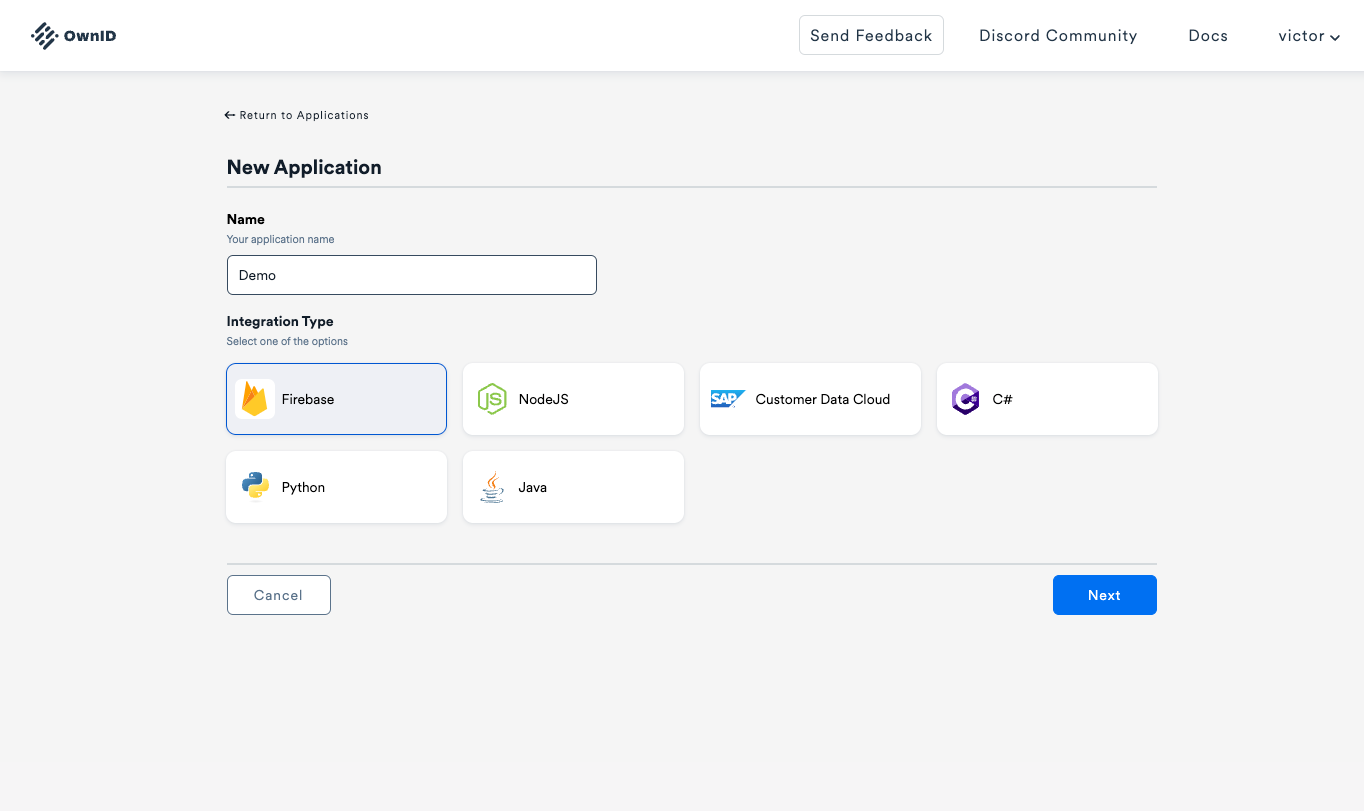
The first step you need to do is to create an OwnID console account, the URL is ownid.console.com. Registration is very easy: you can use your email or you can register using your GitHub account.
Once you have created your account, you will create an application. Then, you'll give the application a name and select Firebase as the integration type.
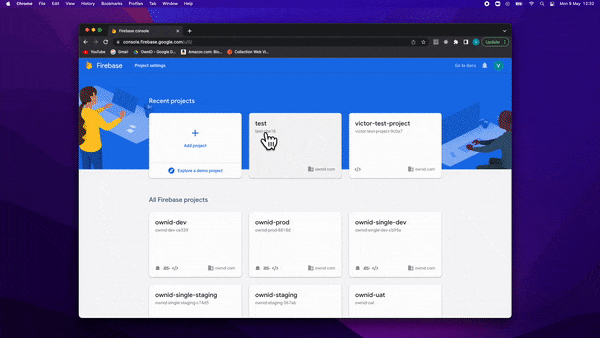
On the next screen, you will upload the JSON file with the Firebase private key. To generate this file, you will access the Firebase service page, where you can easily download the JSON file, as shown in this animation:
Once you have uploaded the JSON file to the OwnID console, you will then add a few lines of code on the client-side to load the OwnID JS library and render the button on the registration and login forms.
In the console, you will find the necessary code written for Angular, React and Vanilla JS.
For example, if our FE is coded using ReactJS, the steps to follow are:
First step
Install OwnID React SDK on your project with the following command
npm install @ownid/react
Second Step
Import the SDK library and initialize it. You will need to import getAuth, getIdToken, and signInWithCustomToken if your project is not using these functions already.
import { getAuth, getIdToken, signInWithCustomToken } from 'firebase/auth';
import { OwnIDInit } from '@ownid/react';
...
  <OwnIDInit config={{ appId: '<your-app-id>', sdk: 'firebase', firebaseAuth: {
    getAuth,
    getIdToken,
    signInWithCustomToken
  } }}/>
Third Step
Once you have imported and initialized the OwnID SDK, you'll then add the code to render the OwnID button next to the password field.
First, let's do it on the Login page:
function LoginComponent() {
    const emailField = useRef(null);
    const passwordField = useRef(null);

    function onLogin() {
        //redirecting user to the account page
        window.location.href = '/account';
    }

    return (
        <form>
            <input ref={emailField} type="email" name="email" />
            <input ref={passwordField} type="password" name="password" />
            <button type="submit">Log In</button>
            <OwnID type='login'
                passwordField={passwordField}
                loginIdField={emailField}
                onError={(error) => console.error(error)}
                onLogin={onLogin} />
        </form>
    );
}
Here you will notice two callback functions: One is onLogin which will be triggered whenever anyone does a successful login using OwnID ( in this example, it is redirecting to the account page). The other one is onError, which is triggered whenever there's an error.
Now, let's add the code snippet to the registration page:
import { OwnID, ownidReactService } from "@ownid/react";
function RegisterComponent() {
    const emailField = useRef(null);
    const passwordField = useRef(null);

    async function onSubmit() {
         //Call your existing firebase register function
         await createUserWithEmailAndPassword(getAuth(), emailField.current.value, passwordField.current.value);
         //Enroll device with OwnID
         await ownidReactService.enrollDevice();
    }

    return (
        <form onSubmit={onSubmit}>
            <input ref={emailField} type="email" name="email" />
            <input ref={passwordField} type="password" name="password" />
            <button type="submit">Register</button>
            <OwnID type='register'
                loginIdField={emailField}
                passwordField={passwordField}
                onError={(error) => console.error(error)} />
        </form>
    );
}
Here, you will note that, after the call to the Firebase function, createUserWithEmailAndPassword is needed to call to ownidReactService.enrollDevice() to successfully register a user with OwnID.
After this step, everything will be ready for your web users so they can enjoy a passwordless, frictionless, and cross-channel registration and authentication experience.
You can download our sample projects from GitHub using this link - remember to add your Firebase configuration and OwnID appID after the download. Also, feel free to join our Discord Server to get updates or support, or to provide feedback. We'd love to hear from you!


.png)


