.svg)
How To Implement Passport.js in Nest.js: An Easy Tutorial

NestJS is a modern framework of Node.js. It's used to easily make server-side routes and other things related to server programming. NestJS is a framework on top of Node.js like Express.js, but it has more features.
Passport.js is used to authenticate Node.js apps. It makes authentication very easy with various strategies. For example, if you want to add Facebook login or Twitter login to your site, you implement the strategy for it.
In this post, we'll create a simple NestJS app and integrate Passport.js into it using the Passport local strategy.
Passport.js is used to authenticate Node.js apps. It makes authentication very easy with various strategies.
The Setup
To create a NestJS app, we need to install the nestjs CLI from a terminal, using the below command.
npm i -g @nestjs/cli
Notice that if you're using a Mac, you have to add the sudo keyword in front of the command and also give your password. After installing the NestJS CLI, we can create a new NestJS app by giving the below command from the terminal.
nest new nestjs-passport
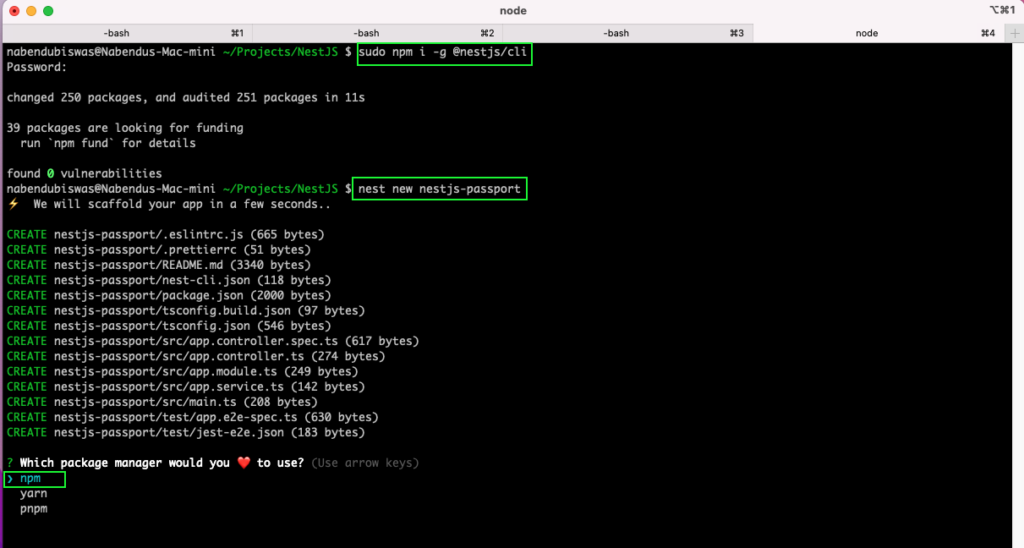
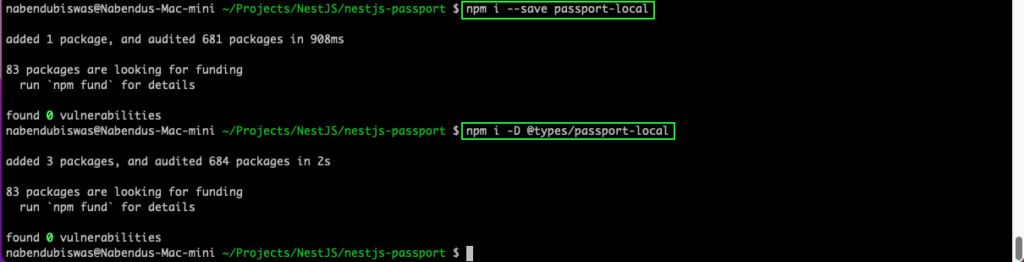
The above command will ask us for a package manager. You can choose npm or Yarn, as per your preference. After the NestJS app is installed successfully, we need to change directories. Now, we can install the passport package and its utility module for nestjs.
npm i --save @nestjs/passport passport

We'll also install the package for passport-local and it's types. It's one of the strategies of Passport, which allows the app to authenticate with username and password.
User Service and Auth Service
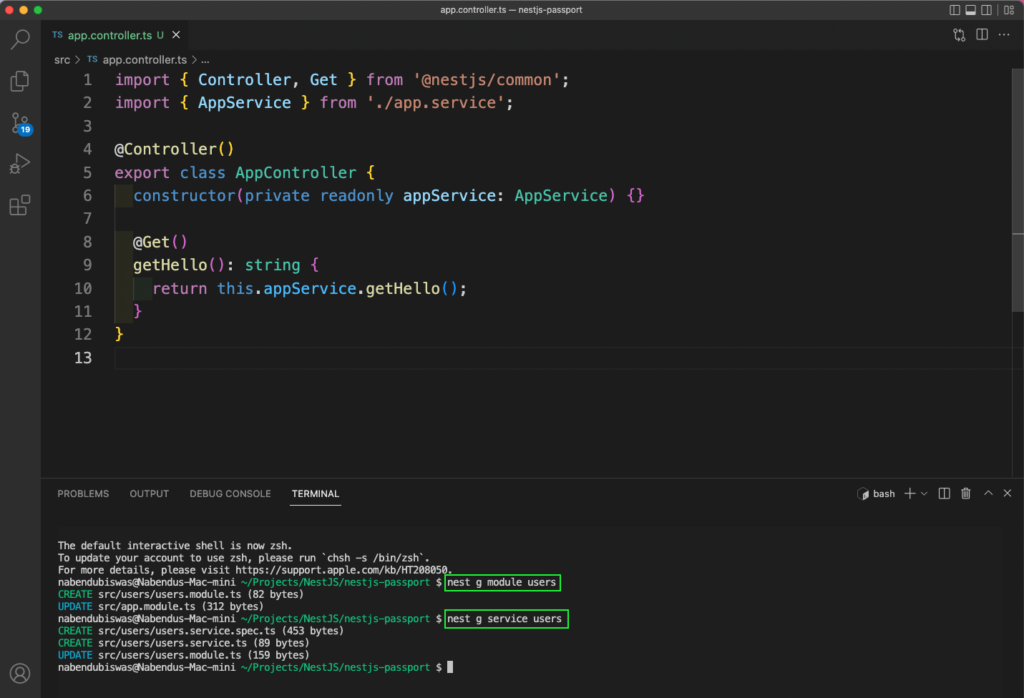
Now we'll create the UsersService. For this, we need to create module and service. In NestJS, this is done easily through the command line. So let's give the below commands from terminal to create both.
nest g module users
nest g service users
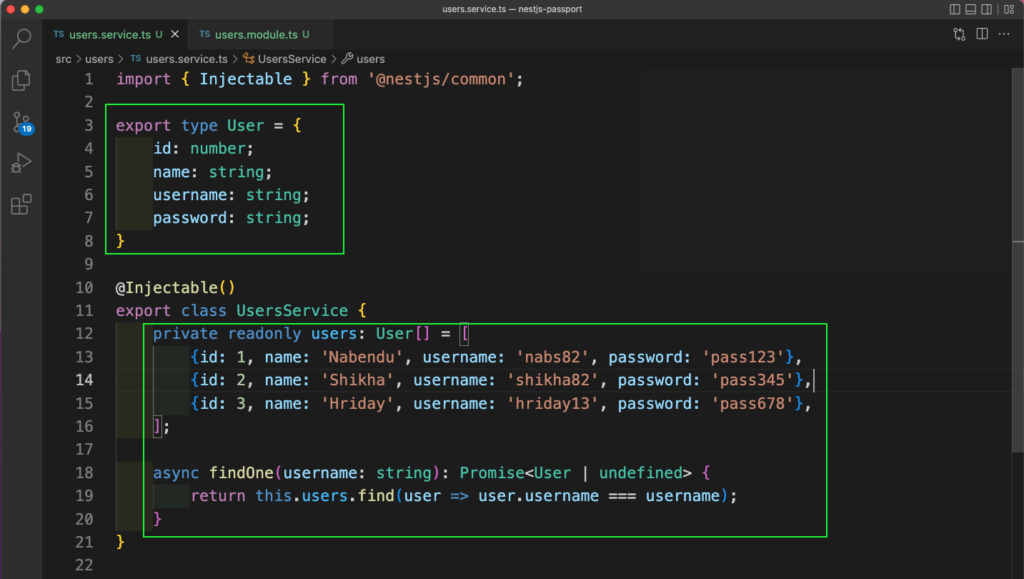
Now, in the users.service.ts file, we’ll create a users array. It’ll contain three objects which contain the data of three users. Since we use TypeScript in NestJS, we need to create the type of it as well.
We’ve also created a function called findOne, which returns a Promise. Again, we’re giving the type here because of TypeScript. Inside the function, we’re using the find method to find the passed user from the users array.
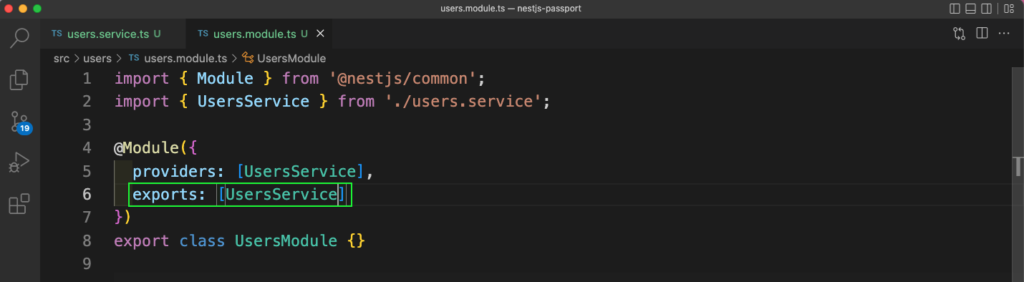
Next, we also need to export the UsersService from the users.module.ts file.
Now, in the auth.module.ts file, we need to add the UsersModule. We’re also creating the module and service for auth from the integrated command line. The commands are shown below.
Nest g module auth
nest g service auth

In the auth.service.ts file, we’ll add the UsersService through the constructor. After that, we’re creating a function called validateUser, which takes a username and password. It utilizes the findOne function from the UsersSevice to find the user from our stored array. After that, it compares the passed password with the stored password.
If the user matches, we return id and name back by extracting it using the spread operator.

Passport Local Strategy
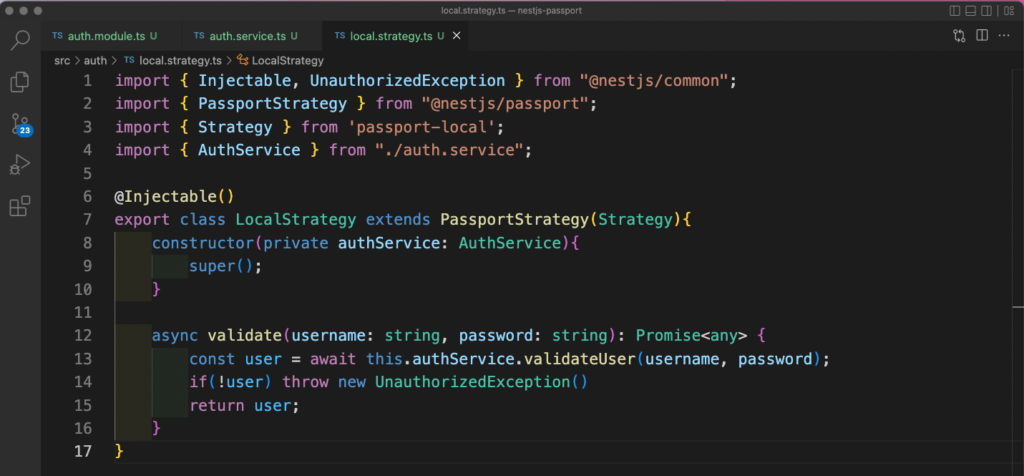
Next, let’s take a look at the Passport local strategy. Here, we need to create a local.strategy.ts file in the auth directory. Inside it, we’ll add the AuthService through the constructor. After that, we have a validate function, which is using the validateUser from AuthService. It’ll return the user, if we found it, or else it’ll thrown a NestJS error.
We need to add the PassportModule and LocalStrategy into the auth.module.ts file.

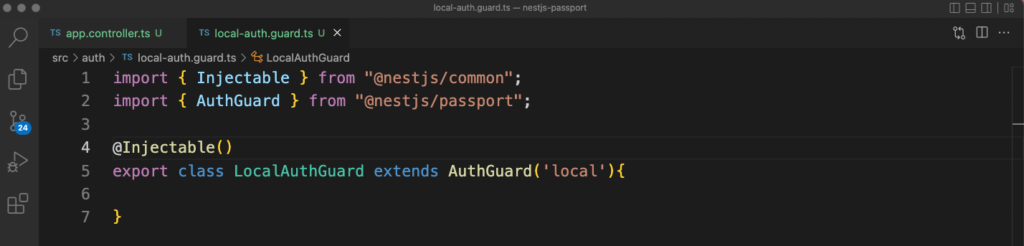
We’ll now implement Guard in our project. It’s required to implement local strategy of Passport. Later on, we’ll add in the logic to access protected routes. So, create a file called local-auth.guard.ts inside the auth directory. Here, we’re extending the class LocalAuthGuard from AuthGuard from NestJS.
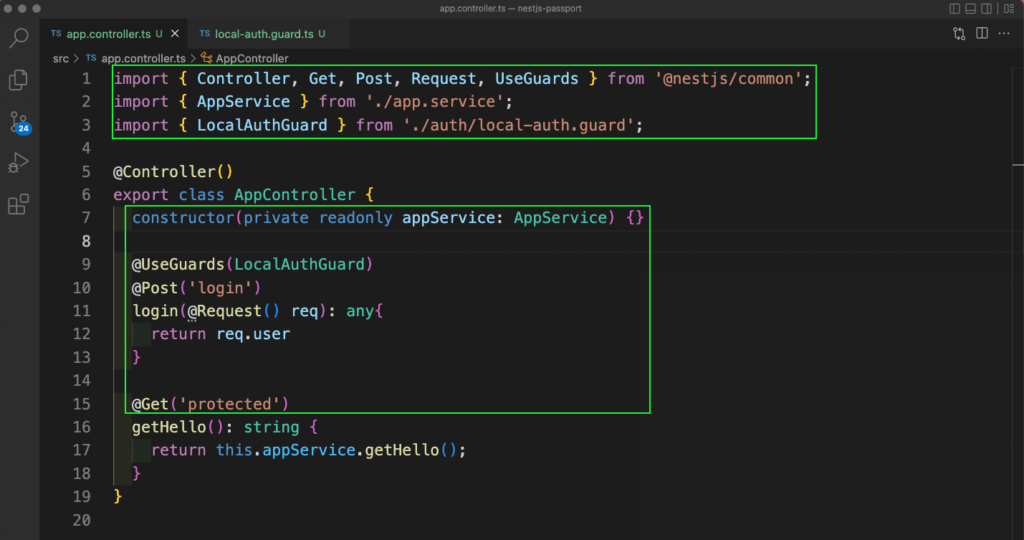
Finally, we’ll update our app.controllers.ts file to create a POST route of login and a GET route of protected. In the POST route, we’re first adding the decorator of LocalAuthGuard using the UseGuards from NestJS. Next, we’re using the decorator of Post with login text. Then the login function with the parameter of Request. If it’s successful, we’ll get back the user.
These decorators are similar to Angular, and they’re used in NestJS a lot also. It always executes before the function, which is login here. Our GET route is called protected, but we haven’t implemented it completely. We’ll do that in the next section.
Checking Through Postman
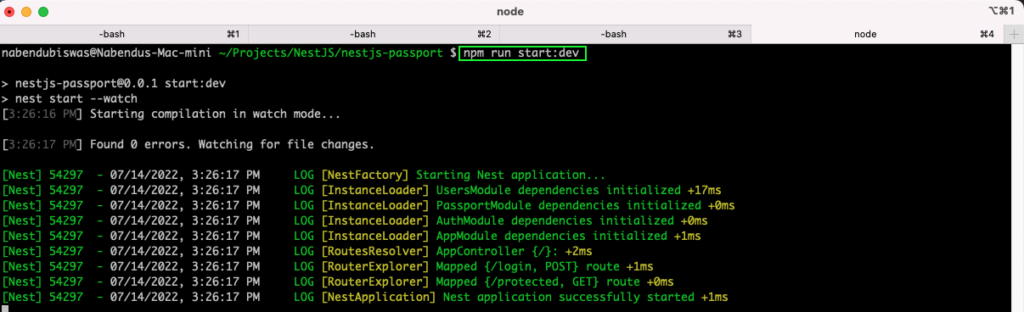
The basic route coding is done, so let’s test it with Postman. But first, we need to start our application with the below command from the terminal.
Npm run start:dev
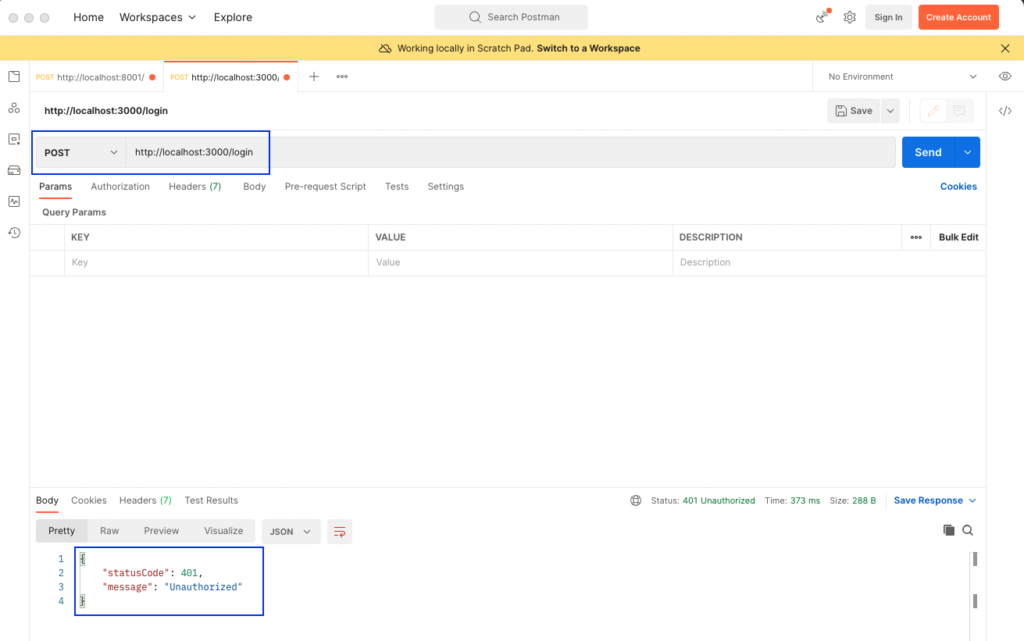
In Postman, go to http://localhost:3000/login. The method needs to be POST, then we’ll click on the Send button. We’ll get back a statusCode of “401” and a message of “Unauthorized.”
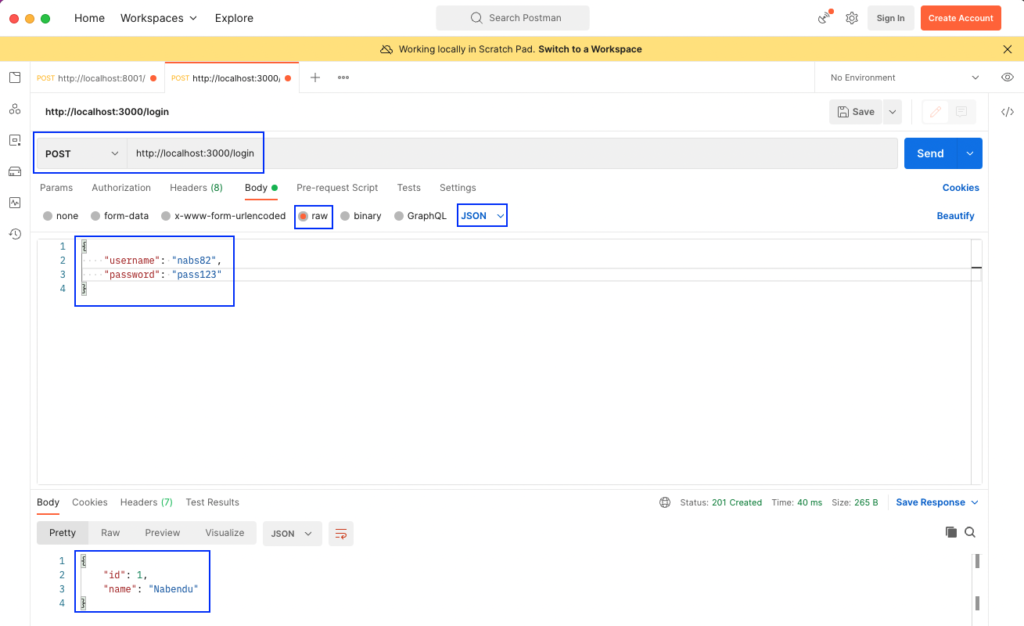
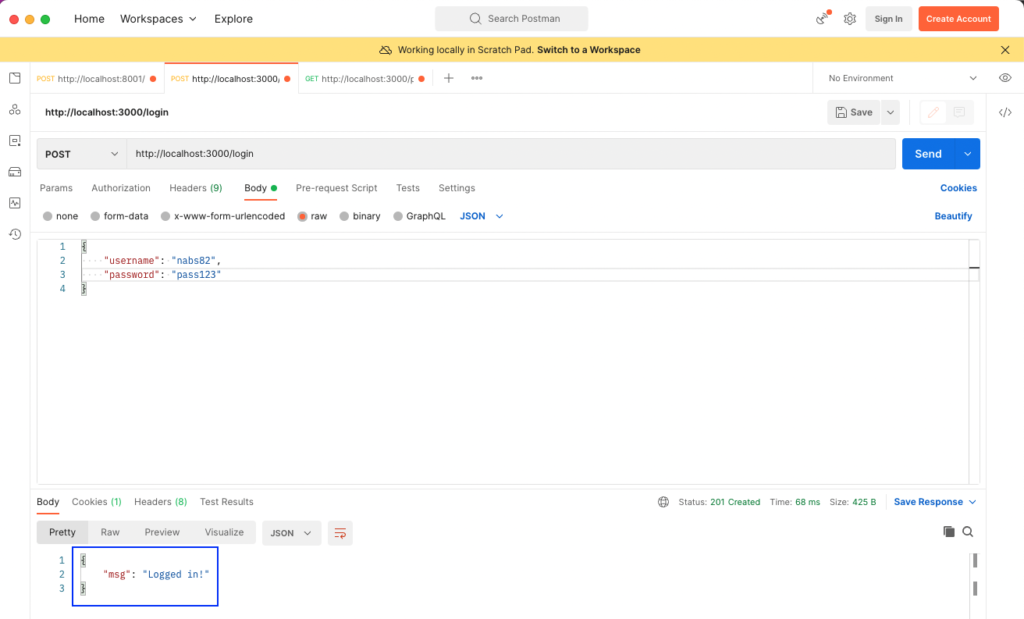
We need to pass the correct username and password to be able to login. So, let’s send the username and password as a JSON object and click on Send. From this file, we’ll get a statusCode of “201” and get back the id and name from our stored data.
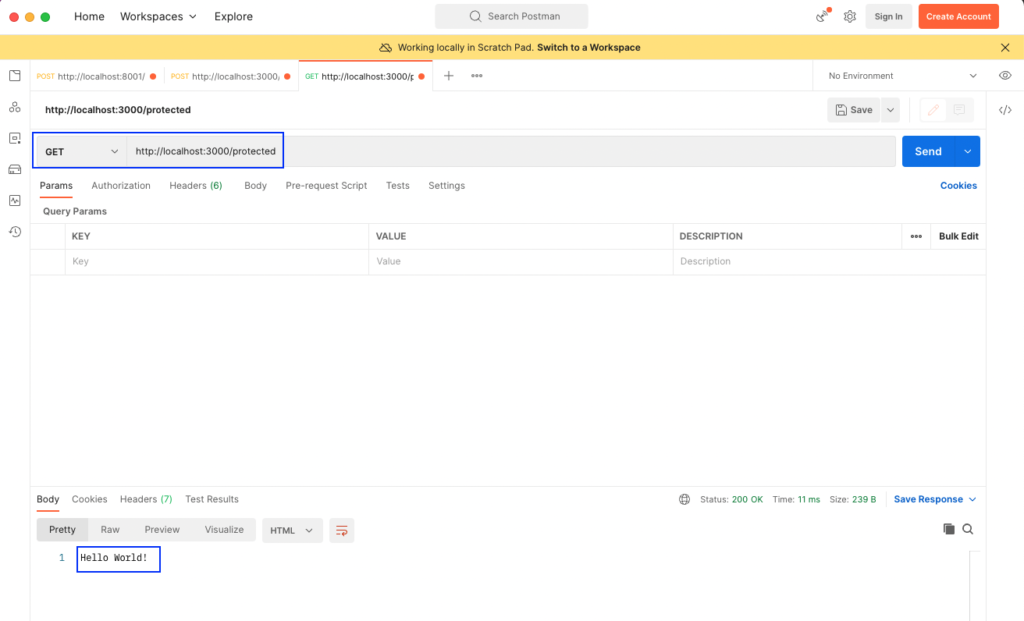
If we try to go to http://localhost:3000/protected, it'll work. This is an issue in the authentication, so let's go ahead and implement the logic for only logged-in users to be able to access this route.
Session Strategy
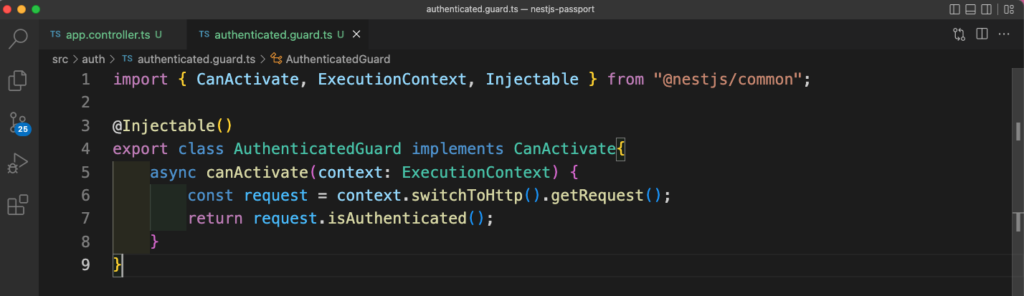
We'll use the session strategy to authenticate the user and allow them authorized access to the protected route. First, we need to create a file called authenticated.guard.ts inside the auth folder. Here, we have some simple authentication logic. In it, we take the request from the context and check whether it's authenticated.
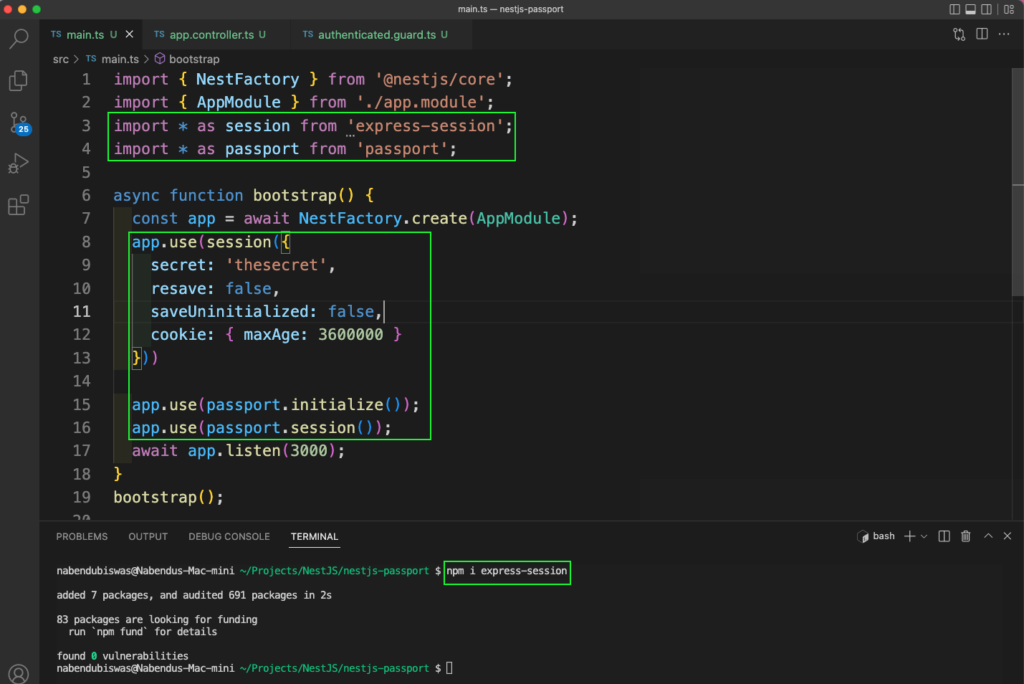
For this to work, we need to save the session data when the user logs in. So we need to install the package express-session first. Now we need to add that along with passport in the root of our application. So in the main.ts file, first import session and passport. After that, we're doing some boilerplate configuration here, per the documentation. The sessions data is stored as cookies, which are then used to authenticate users. Here, we've given the maxAge of the cookies in seconds.
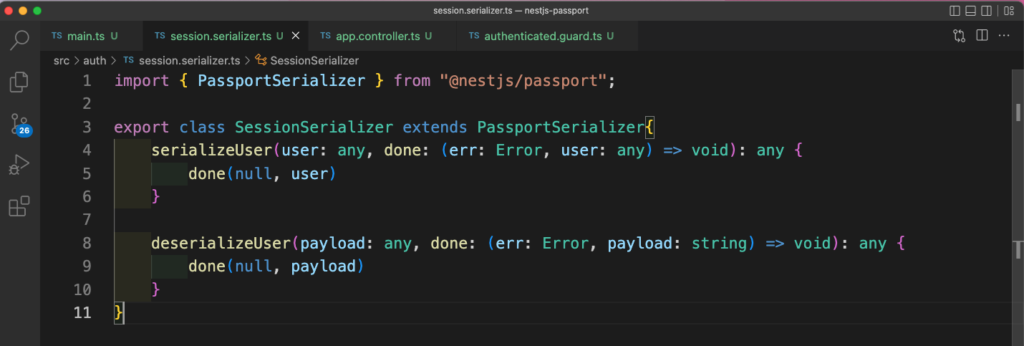
We need to create our session serializer now. So, create a file called session.serializer.ts inside the auth folder. This serializer decides which type of data we need to save in our session cookie. Here, we're saving the whole user object with the serializeUser method. We're also deserializing the payload to get the user data back.
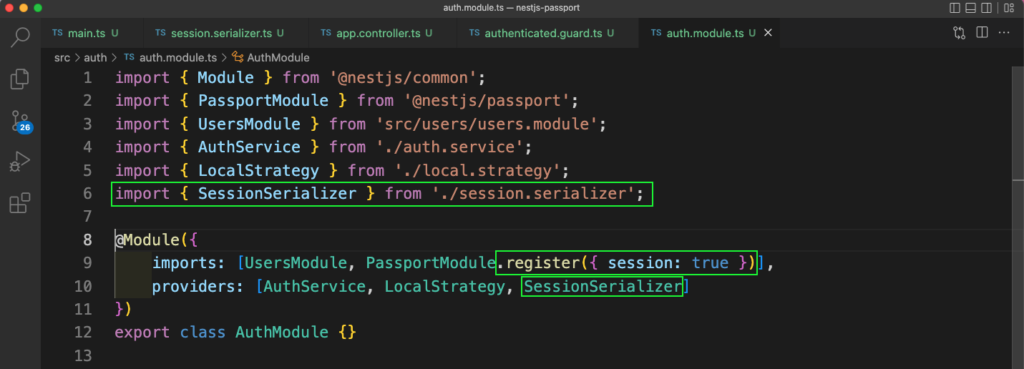
Back in the auth.module.ts file, we need to add the SessionSerializer. We also need to update the PassportModule to use session.
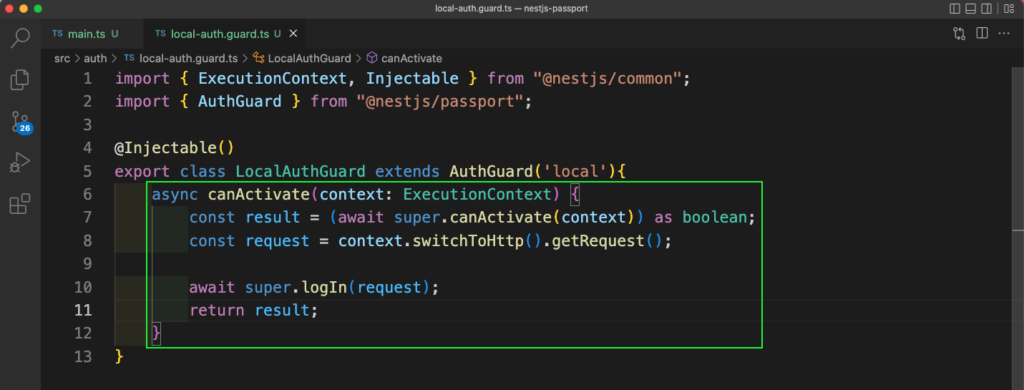
The final piece is to update our local-auth.guard.ts file. Here, we've written a function called canActivate, which will take the request from the context. After that, it'll execute the logIn() method.
Using Guards and Sessions
As per the official documentation, Guards have one responsibility. They allow or disallow a route to handle a certain request depending on the condition it meets. In our case, the Guard will allow only the authenticated user to go to the protected route.
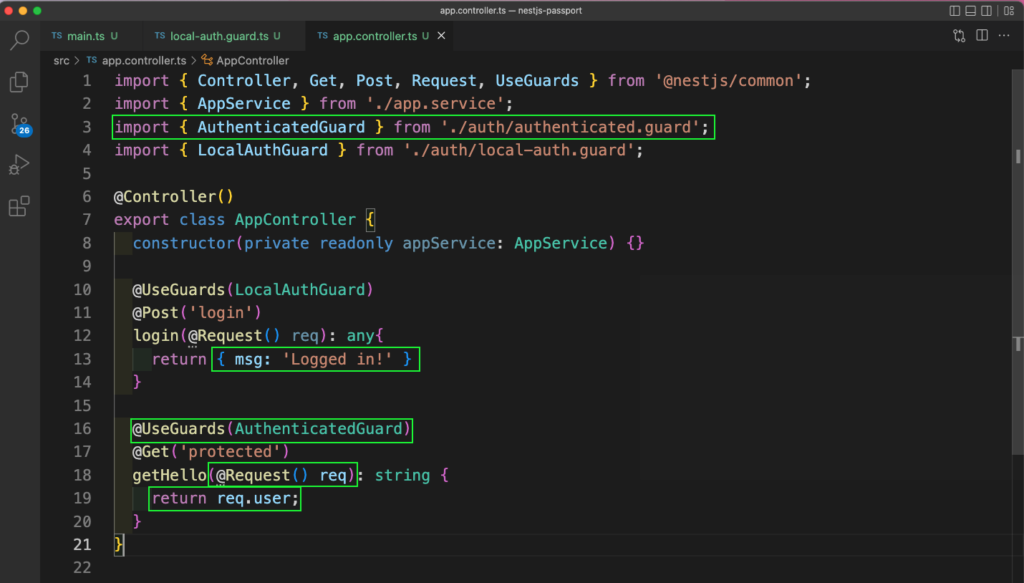
We'll update our app.controller.ts file. The GET route can only be accessed if it's authenticated. Here, we're using the UseGuard decorator to run the AuthenticatedGuard and check if the user is authenticated.
Guards have one responsibility. They allow or disallow a route to handle a certain request depending on the condition it meets.
Back in Postman, we'll login again and get a message back this time.
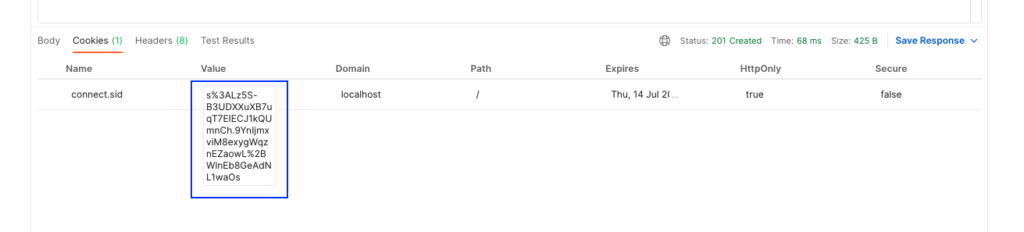
Now, in the Cookies tab, we can see a cookie been saved.
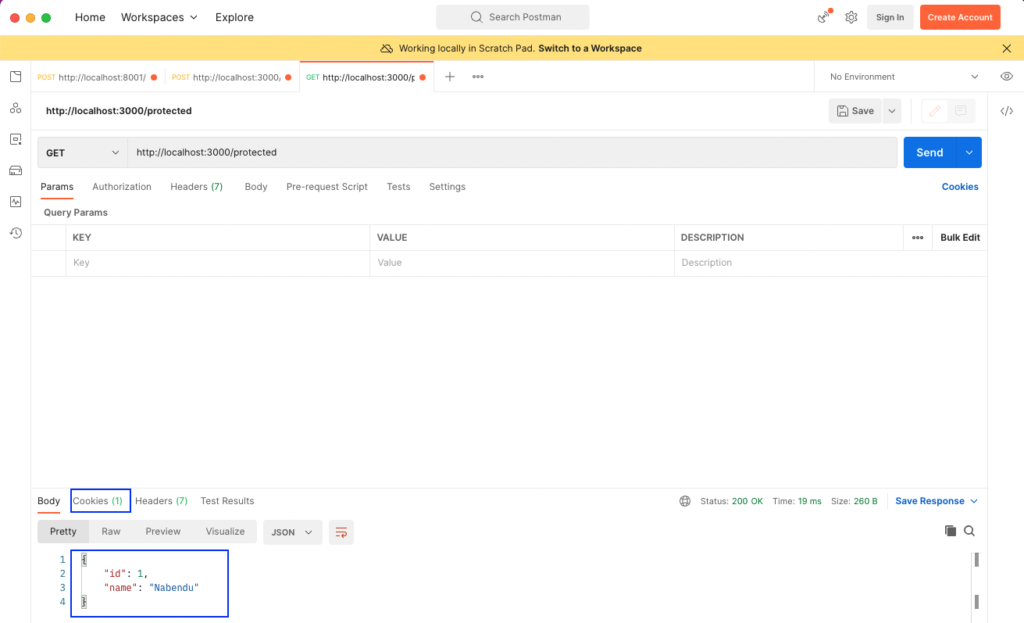
Now, when we go to our protected route, we'll get the user back. Also notice that the cookie has been automatically used here.
This completes our Passport.js implementation in our NestJS project. You can find the full code for this tutorial in this Github repo.
Conclusion
In this post, we first set up a NestJS app and added Passport.js into it. We then created user and auth components and implemented Passport local strategy in the app. Next, we used the method of sessions to store the login information in a cookie. With that cookie, we're able to access our protected route easily.
Now you should have all the tools and knowledge you need to implement these helpful features in your own projects!
This post was written by Nabendu Biswas. Nabendu has been working in the software industry for the past 15 years, starting as a C++ developer, then moving on to databases. For the past six years he’s been working as a web-developer working in the JavaScript ecosystem, and developing web-apps in ReactJS, NodeJS, GraphQL. He loves to blog about what he learns and what he’s up to.


.png)
.png)